[13-JAN-23] The Startup Manager is a tool provided by our LWDAQ Software. It opens, configures, and runs other tools so as to start up a pre-defined data acquisition, recording, and analysis process to support an experiment. A startup procedure is a list of actions we must take to start our data acquisition system. The Startup Manager allows us to execute our startup procedure with the press of a button. All we have to do is define our startup procedure in a text file called a "startup script".

A startup script is a text file that describes one or more startup steps. A startup step might open, configure, and run a tool. Or it might define rules for opening multiple instances of a particular tool. Here are some example startup procedures, each of which we can define with a startup script, so that each of them may be executed automatically by the Startup Manager.
The Startup Manager's Browse and Load buttons allow us to select and load a startup script into the Startup Manager. When we load the script the Startup Manager prints a list of steps defined by the script. Each step has an index, a step type, a name, and a tool that the step operates upon. Press Step and the Startup Manager will execute a single step in the startup procedure and then stop. Press Step again, and the Startup Manager executes the next step in the procedure. Press Run and the Startup Manager will execute every step in the startup procedure, one after another.
Startup Manager scripts are not TclTk scripts, although they usually contain snippets of TclTk code. Startup scripts obey a syntax particular to the Startup Manager. We present this syntax in detail later, but for now, here is an example script that opens the Image Browser and instructs the tool to display all the GIF images in the LWDAQ/Images directory.
communal:
name: LWDAQ_GIF_Examples
tool: Image_Browser
commands: {
  set tconfig(directory) [file join $LWDAQ_Info(program_dir) Images]
  Image_Browser_refresh
}
config:
  file_filter "*.gif"
end.
This script consists of a single step of type "communal". A communal step opens a tool within the same LWDAQ process that provides the Startup Manager. Further tools we open with communal steps share the same LWDAQ process also. They share the same event manager and the same instruments. Communal tools take turns to perform data acquisition. So long as they continue to run, they will not interfere with one another.
We invite you to save the above script to disk as a text file and try it out. If you don't have your own text editor, you can use the built-in LWDAQ text editor. Select New Script in the Tools menu, paste the above script into the editor, and use SaveAs to create the script file. Once you have selected a startup script in the Startup Manager, you can edit the script with the Startup Manager's Edit button. Edit the script in the Edit Window and then save to disk with the Edit Window's Save button.
There are two disadvantages to running tools communally. First, if one tool freezes, all the other tools sharing the same LWDAQ process will freeze also. Second, only one tool of each type can run in a single LWDAQ process. If we try to run two Image Browsers with two communal steps, the Startup Manager will not open a second Image Browser with the second communal step. If we want our tools to run independently of one another, or if we want to run multiple instances of the same tool, we use a "standalone" step. In the following script, we once again open the Image Browser, but this time the Image Browser runs as an independent process.
standalone:
name: LWDAQ_GIF_Examples
tool: Image_Browser
commands: {
  set tconfig(directory) [file join $LWDAQ_Info(program_dir) Images]
  Image_Browser_refresh
}
config:
  file_filter "*.gif"
end.
A standalone tool is independent of the process that hosts the Startup Manager. A standalone tool has its own event queue. It uses the pre-emptive multitasking of modern operating systems to run independently of all other user tools. If one standalone tool freezes, no other tool freezes. Standalone tools present only one window. There is no separate little window with a Quit button.
After we load a script, the Startup Manager's step index will be zero. The first step in the script is step number one. We press Step to increment the step index and execute the first step. We execute the current step again with Repeat. We run the entire script, one step after another, with Run. To go to a step somewhere in the middle of a script, enter the step number by hand, as it is listed in the script-load listing. We can load and run a script automatically when we open the Startup Manager by checking Auto_Load and Auto_Run, pressing Configure to open the configuration panel, and pressing Save Configuration. The next time we open the Startup Manager, it will load and run the entire script. If we want the Startup Manager to close when it has finished the script, we check Auto_Close as well. If the Startup Manager spawns several independent processes, we might want the Startup Manager and its own LWDAQ process to quit once the startup is complete. If so, we check Auto_Quit.
[09-MAY-22] A startup script is a text file. It consists of a sequence of startup steps, each of which is defined by its own contiguous section of text in the script. Each step begins with its step type. We list the step types below.
| Step Type | Function | Mandatory Fields |
|---|---|---|
| communal | run a tool as a communal process | name, tool, config |
| standalone | run a tool as a standalone process | name, tool, config |
| default | define parameters and commands for all uses of a tool | name, tool, config |
| startup | execute diagnostic and reporting commands | name |
Each step contains a number of fields. Every step must contain a name field. The table above lists which fields are mandatory in which types of step. Here is a script that tells the Startup Manager to run the Fiber Positioner, load a travel script and start the travel operation. Any line that begins with a "#" character is a comment and will be ignored by the Startup Manager. When we specify a directory or file in a startup script, we must forward slashes in place of backslashes, and we should avoid using names that contain spaces. Even on Windows, where backslashes are the traditional separator between directory names in a file path, we use forward slashes. The path "C:\Telemetry\P0158" should be written "C:/Telemetry/P0158".
# This step opens a Fiber Positioner and starts a travel operation.
communal:
name: "Fiber Set A"
tool: Fiber_Positioner
commands: {
  Fiber_Positioner_cmd Travel
}
config:
  travel_file "~/Desktop/Perimeter.txt"
end.
When the new tool is created, the window title will consist of the tool name, its version number, and the name of the startup step that invoked the tool. In the example above, when our Fiber Positioner has version 1.9, the window title would be "Fiber_Positioner 1.9: Fiber Set A". The names of the steps are an easy way to distinguish between otherwise identical tools created by the Startup Manager. The config field lists values that the Startup Manager should assign to a tool's configuration parameters. In this case, we set the "travel_file" to a file on our desktop called "Perimeter.txt". The commands field contains commands that will run after the configuration values are applied. In the above example, there is a single command, which initiates a travel operation.
The commands we provide in a commands field can be as complex as we like. But they will often use information particular to the step and the tool, so we declare a number of variables with abbreviated names for use in startup script command fields. The table below lists these variables. For example, we can refer to tool configuration parameter called "file_name" with the phrase "tconfig(file_name)". That is, "$tconfig(file_name)" will return the value of the "file_name" parameter in the tool's configuration array. We can refer to the name of the step with "name" and the name of the tool with "tool".
| Variable | Value | Value Type |
|---|---|---|
| name | the startup step's name | a string |
| tool | the target tool's name | a string without spaces |
| tconfig | the target tool's configuration array | many elements |
| tinfo | the target tool's information array | many elements |
| LWDAQ_Info | global information array | many elements |
If we want to run more than one Fiber Positioner, we must run each in a different process. They may end up taking turns to access the same data acquisition server, but they will operate independently on the data acquisition computer. The following script creates two Fiber Positioners to control two sets of fibers, each set with a different travel operation, and each with different cable sockets for the north-south and east-west control voltages.
standalone:
name: "Fiber Set A"
tool: Fiber_Positioner
commands: {
  Fiber_Positioner_cmd Travel
}
config:
  travel_file "~/Desktop/Perimeter.txt"
end.

standalone:
name: "Fiber Set B"
tool: Fiber_Positioner
commands: {
  Fiber_Positioner_cmd Travel
}
config:
  travel_file "~/Desktop/Hysteresis.txt"
end.
The window of a standalone tool will have a title beginning with "Standalone", as in "Standalone Fiber_Positioner 1.9: Fiber Set A". If we open several tools of the same type, they may share some of the same configuration parameters and startup commands. A default step defines default configuration and commands for a given tool. The following default step specifies how the Neuroplayer should be configured to start playing the most recent NDF archive in a recording directory, use a playback interval of eight seconds, and export its signals to an EDF file.
default:
name: "Neuroplayer Defaults"
tool: Neuroplayer
commands: {
	Neuroplayer_play "Last"
	Neuroexporter_begin "Archive"
	Neuroexporter_export "Start"
}
config:
	play_interval "8"
	export_format "EDF"
	export_combine "1"
	export_duration "600"
	export_reps "*"
	enable_vt "0"
	enable_af "0"
	af_calculate "0"
	vt_mode "NP"
end.
The default configuration of a tool is applied before the configuration defined for a tool by a particular "communal" or "standalone" step. The default commands are executed before the commands defined by a particular "communal" or "standalone" step. All configuration parameters are applied before any commands are executed. You can amend the defaults for later steps using further default steps. The Forgetful flag tells the Startup Manager that it should delete all pre-existing default commands and configurations for the various tools whenever we load a new script.
The final step type is startup, which does not open a tool or do anything particular unless we tell it to do something with commands. Here is a trivial example. We print a message to the Startup Manager text window and we create a directory for one of the tools to store its data. Both actions are expressed as Tcl code. One uses the LWDAQ print routine and refers to the Startup Manager's text window with the info(text) variable. The other uses the Tcl file command to create a directory if the directory does not exist already.
startup:
name: Initialize
commands: {
	LWDAQ_print $info(text) "Commencing the startup script."
	file mkdir ~/Desktop/Data
}
config:
end.
If we want to disable a step in our startup procedure, but we don't want to delete the step from our script, we can add a disable field to the step, and set its value to one, like this:
standalone:
name: "Fiber Set A"
tool: Fiber_Positioner
disable: 1
commands: {
  Fiber_Positioner_cmd Travel
}
config:
  travel_file "~/Desktop/Perimeter.txt"
end.
With the disable field to "1", the Startup Manager will print a message saying the step is disabled, but otherwise will do nothing with the step. When we want to re-enable the step, we can delete the disable field from the step, or we can simply set the value of the field to zero. The disable field allows us to turn on and off steps without deleting them from our script.
[05-MAY-22] We can run LWDAQ from a Linux or Unix terminal without graphics, as we describe elsewhere. We can do the same with a DOS command shell. The Startup Manager can operate with or without its graphical user interface. When we run the Startup Manager without graphics, it responds to commands entered at the console, or uploaded via a TCPIP socket using the LWDAQ System Server. We can pass our startup script directly into the Startup Manager through a variable, or upload it through a socket. We can start up our data acquisition system over a secure shell if we like. The tools we open with communal and standalone steps will likewise open without graphics. At the time of writing, however, the launching of standalone tools is not well-tested. We anticipate problems when the standalone tool tries to report its progress to the standard output.
[01-FEB-23] By turnkey system we mean a system that requires that the user do nothing more than double-click on a LWDAQ icon to configure and launch all data acquisition processes. We refer to the launch icon as the turnkey icon. Our first step in creating a turnkey icon is to configure our Startup Manager to start up our system. We check Auto_Run, Auto_Load, and Auto_Close. If all the processes started by the Startup Manager are standalone processes, we can check Auto_Quit to exit the Startup Manager process as well. We test our Startup Manager by opening LWDAQ and selecting the Startup Manager from the Tool menu. The Startup Manager should load and run its script, get everything working, and then close or quit as specified. If the Startup Manager quits, all standalone processes should keep running.
Now that the Startup Manager is configured, we open a Bash or DOS shell, navigate to the LWDAQ directory and start our data acquisition system with a single command. In a Bash shell we type:
./lwdaq Turnkey.tcl
In a DOS shell we type:
LWDAQ.bat Turnkey.tcl
The single command launches LWDAQ and runs the startup script. To make our turnkey icon, we must make an icon that runs the same command. How we do this depends upon our operating system, with Windows being the simplest and Linux being the most complicated.
Windows: Navigate to LWDAQ/LWDAQ.app/Contents/LWDAQ/Modes. Make a shortcut to Turnkey.bat. Put the shortcut on your desktop and call it "LWDAQ_Turnkey". Assign to the shortcut the icon in LWDAQ.app/Contents/Windows. Double-click on the desktop icon and the Startup Manager will run.
MacOS: Open a terminal and navigate to the LWDAQ directory. Enter pwd to print the full path of the LWDAQ directory. Run LWDAQ and use the New Script option in the Tool menu to create a text file containing the following line. By $LWDAQ_DIR we mean the full path to the LWDAQ directory.
$LWDAQQ_DIR/lwdaq Turnkey.tcl
Save the text file as "LWDAQ_Turnkey" on your desktop. In a terminal, navigate to your desktop and enter the following command to make the text file an executable file:
chmod +x LWDAQ_Turnkey
Select LWDAQ_Turnkey and press Command-I to show information. Do the same with the LWDAQ icon in your LWDAQ directory. Copy the LWDAQ icon from the LWDAQ.app panel to the LWDAQ panel. In the LWDAQ panel, for "Open with:" choose "Termina.app". Close both information panels. Double-click on LWDAQ_Turnkey and the Startup Manager will run. You may be left with a dead terminal shell window with "[Process completed]" at the bottom. To remove these dead terminal windows, open a terminal, go to Preferences, Profiles, Shell, and select "Close if the shell exited cleanly".
Linux: Steps required to create a desktop file on Linux depend upon your flavor of Linux. For Ubuntu, we provide these instructions. Once we can launch LWDAQ normally by double-clicking the icon, we edit the desktop file so that instead of launching LWDAQ with "lwdaq", it does so with "lwdaq Turnkey.tcl". For example, on Ubuntu, the content of our desktop file will be something like this:
[Desktop Entry]
Version=1.0
Type=Application
Terminal=true
Exec=/home/kevan/Active/LWDAQ/lwdaq Turnkey.tcl
Name=LWDAQ_Turnkey
GenericName=Data Acquisition Program
Path=/home/kevan/Active/LWDAQ
Icon=/home/kevan/Active/LWDAQ/LWDAQ.app/Contents/Linux/LWDAQ.png
This desktop file will have the LWDAQ graphic icon and be titled "LWDAQ_Turkney". Now, when you double-click on the icon, the Startup Manager will run.
[26-MAY-22] We demonstrate the Startup Manager with an example from neuroscience. You won't be able to run the example startup script successfully unless you have all the hardware required for such a neuroscience experiment, so our example application is not a tutorial or a demonstration, but rather an illustration of how the Startup Manager can be used to start up a complex data acquisition system.
Suppose we have five rats in cages, and each rat has implanted under its skin a Subcutaneous Transmitter (SCT) that transmits one or two channels of electroencephalogram (EEG) at various sample rates. There are three rats in one cage and two rats in another cage. Each cage sits on an Animal Location Tracker (ALT) that receives EEG signals from the animals in the cage. We want to download the signals from both ALTs and record them to disk as Neuroscience Data Format (NDF) files. The recording requires that we start, configure, and run two Neurorecorders. We want to extract the signals belonging to each animal and export them to one European Data Format (EDF) file per animal. The exporting requires that we start, configure, and run five independent Neuroplayers. We want to record video from two Animal Cage Cameras (ACC), which requires that we start and run the Videoarchiver. In all, we have eight processes to start. An error in our configuration of any one of them will compromise our experiment. The Startup Manager allows us to start the system in an identical way every time. To start all eight processes, we load Startup_Demo.tcl into the Startup Manager and press Run. But let's suppose we load the script and use Step to go through each step one at a time.
The first step is a startup step. It creates the directory structure that we need for our NDF and EDF files. If these directories exist already, the startup step leaves them unchanged.
# If the directories we need for this recording don't exist, create
# them with this startup manager step.
startup:
name: "Verify Directories"
commands: {
	file mkdir "~/Desktop/Telemetry"
	file mkdir "~/Desktop/Telemetry/C0593"
	file mkdir "~/Desktop/Telemetry/C0593/A1"
	file mkdir "~/Desktop/Telemetry/C0593/A2"
	file mkdir "~/Desktop/Telemetry/C0594"
	file mkdir "~/Desktop/Telemetry/C0594/A3"
	file mkdir "~/Desktop/Telemetry/C0594/A4"
	file mkdir "~/Desktop/Telemetry/C0594/A5"
}
end.
The next step is a standalone that starts a Videoarchiver as a standalone process and executes its Record_All command. Before we run the Startup Script, we must prepare the Videoarchiver by creating a camera list, saving the camera list to disk, and saving the Videoarchiver's configuration to disk. The Videoarchiver's configuration tells the Videoarchiver where to find the camera list. The camera list tells the Videoarchiver the names, addresses, and configuration of our cameras, and specifies any lamp schedule we may wish to use with the cameras. Now the Videoarchiver is ready for Record_All.
# Open the Videoarchiver and start recording from all cameras in its camera list
standalone:
name: "Videoarchiver for All Cameras"
tool: Videoarchiver
commands: {
	Videoarchiver_record_all
}
config:
end.
We use a default step to define how our Neurorecorders are to behave. They should create new NDF files every hour. Parameter autocreate is an element in the Neurorecorder's configuration array.
# The default behavior of the Neurorecorder is to start recording with
# one-hour long NDF files.
default:
name: "Neurorecorder Defaults"
tool: Neurorecorder
commands: {
	Neurorecorder_record "Start"
}
config:
	autocreate "3600"
end.
The two Neurorecorders we start with their own standalone steps. We don't have to specify the length of the NDF files, because this has been done for all Neurorecorders using the previous default step. What we do have to define for each Neurorecorder is the IP address of the ALT and the directory in which we should record the NDF files. We use the config: field of the step for these values. Parameters daq_ip_addr and record_dir are elements in the Neurorecorder's configuration array.
# Our first Neurorecorder will record from a data receiver with its own IP
# address and recording folder, as given in the configuration field. The name of
# the step gives the serial number of the receiver.
standalone:
name: "Animal Location Tracker C0593"
tool: Neurorecorder
config:
	daq_ip_addr "10.0.0.93"
	record_dir "~/Desktop/Telemetry/C0593"
end.

# Another Neurorecorder for another data receiver with its own IP address and
# name.
standalone:
name: "Animal Location Tracker C0594"
tool: Neurorecorder
config:
	daq_ip_addr "10.0.0.94"
	record_dir "~/Desktop/Telemetry/C0594"
end.
Now we define the default behavior of the Neuroplayers. We set the play interval for export, the export format, we set up the type and nature of the export, and we disable various displays and calculations not needed by the export that will reduce the processing power required by the export process.
# The Neuroplayers are all going to export all selected signals to ten-minute
# EDF files. The voltage vs time (vt) and amplitude versus frequency (af)
# displays will be disabled. The Fourier transform calculation will be disabled
# also. Playback interval is eight seconds. After one export, we start another
# and another without end.
default:
name: "Neuroplayer Defaults"
tool: Neuroplayer
commands: {
	Neuroplayer_play "Last"
	Neuroexporter_begin "Archive"
	Neuroexporter_export "Start"
}
config:
	play_interval "8"
	export_format "EDF"
	export_combine "1"
	export_duration "600"
	export_reps "*"
	enable_vt "0"
	enable_af "0"
	af_calculate "0"
end.
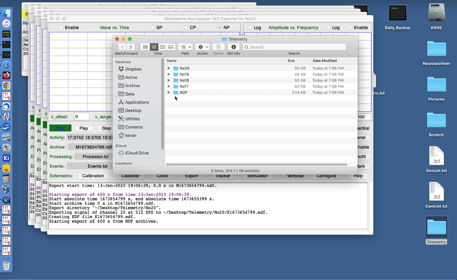
We start five Neuroplayers, one for each animal. We specify for each the source of the EEG signal, which is the directory in which the NDF files for the corresponding ALT are stored, and the directory in which the EDF export file should be stored. We also specify the channel numbers and sample rates of the transmitter that is implanted in the animal we are exporting for.
# Animal One's signal is in the recording from the first Neurorecorder, and we
# will write the EDF files to a subdirectory of the NDF directory. We select two
# channels to export, and specify their sample rates, as is required by the
# exporter. The Neuroplayer will be started by the commands in the Neuroplayer
# default step. This step specifies only the information particular to this
# export process.
standalone:
name: "Exporter for Animal 1"
tool: Neuroplayer
config:
	play_dir "~/Desktop/Telemetry/C0593"
	export_dir "~/Desktop/Telemetry/C0593/A1"
	channel_selector "135:512 135:512"
end.

# Animal Two uses the first recording as well, but different channels exported to
# a separate subdirectory.
standalone:
name: "Exporter for Animal 2"
tool: Neuroplayer
config:
	play_dir "~/Desktop/Telemetry/C0593"
	export_dir "~/Desktop/Telemetry/C0593/A2"
	channel_selector "17:256 18:256"
end.

# Animal Three uses the second recording.
standalone:
name: "Exporter for Animal 3"
tool: Neuroplayer
config:
	play_dir "~/Desktop/Telemetry/C0594"
	export_dir "~/Desktop/Telemetry/C0594/A3"
	channel_selector "20:512"
end.

# Animal Four uses the second recording.
standalone:
name: "Exporter for Animal 4"
tool: Neuroplayer
config:
	play_dir "~/Desktop/Telemetry/C0594"
	export_dir "~/Desktop/Telemetry/C0594/A4"
	channel_selector "39:512"
end.

# Animal Five uses the second recording.
standalone:
name: "Exporter for Animal 5"
tool: Neuroplayer
config:
	play_dir "~/Desktop/Telemetry/C0594"
	export_dir "~/Desktop/Telemetry/C0594/A5"
	channel_selector "33:512 34:512"
end.
If all is set up right, the system will begin to run smoothly. If there are any problems, you will see red error messages in the tool windows, or blue warning messages.